Wednesday, September 26, 2018

Are You The Next Top Master Chef?


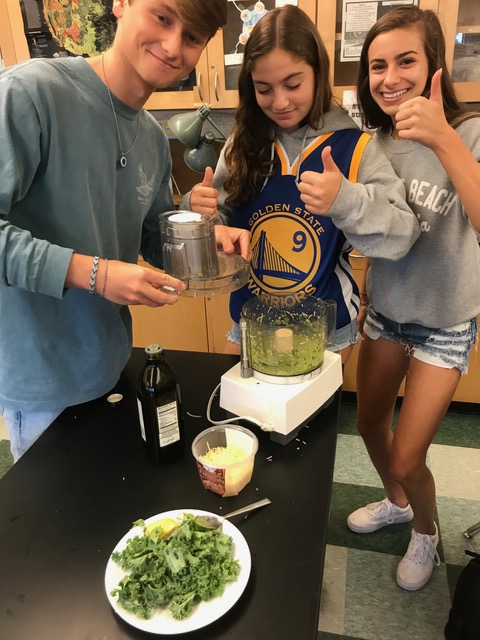
This week involved characteristics of competition, teamwork, and sustainability. Once garden bed groups linked up with another bed to create their team, the race for top master chef was on. The overarching goal of this activity was to create a meal including a common crop in our farm, kale. As teams brainstormed and debated the dish they believed would win top chef, many topics had to be kept in mind. These included appearance, taste, timeliness, had to be vegetarian, ability to keep your work space clean, and of course the special ingredient of kale. On block day teams met at the farm to retrieve any needed crops from the garden. After collecting several ingredients teams then weighed in the amount of crop harvested. Taking ourselves and items back into the classroom the race was on to see which team could please Mr. Stewart's tastebuds the most. Provided with stoves, silverware, pots and pans, and a few basic cooking ingredients such as olive oil, teams began preparing for what they hoped would turn out to be delicious meals. With about 50 minutes, each team washed their crops (and hands!) to start their chef making process. Many struggled at the beginning with dividing up jobs and some even experienced rivalry between teams as everyone wanted to be the top master chef. While recording crops and items used, each team developed their own creative dish involving kale from our farm, making this activity more sustainable than you could imagine. As time headed towards the end of class everyone placed their left over crops in the compost bowl and sat at the edge of their seats to see if their dish earned first place. After being tested by our judge, every student got a taste of the other groups creations. Once the activity was over everyone had a sense of accomplishment no matter what place you received because each and every person became a little closer with their fellow classmates while also helping our planet be more sustainable.  - Makaela


Compost


This past week in the farm we focused on our management jobs and finishing transplanting starters or planting seeds.  For the compost management job, the assigned students were tasked with adding and organizing the pile. The bottom layer is comprised of sticks to promote aeration, followed by layers of brown and green plant matter, and compost.  The compost is sprinkled on top of the pile as an "inoculant" because compost contains lots of bacteria that aids in the decomposition of the plant matter. Contrary to popular belief, turning compost can be less effective than just leaving the pile be.  Heat is key in decomposition, and it gets hot in the middle of the pile. Turning the pile can allow the heat to escape. We did not turn the pile, but we did add material like eaten apples and peaches. Also, we kept the pile's matter neat and evenly distributed so that the maximum amount of decomposition occurs.  Lastly, we filled over 2 buckets with the compost the farm produced and added it to the farm's big pile.
-Alex Peters


Sheet Mulching


This week, after having planted most, if not all, of our seeds in our beds, we began taking care of other jobs around the farm. In addition to our management jobs, where we work on composting, watering, farm infrastructure maintenance, and managing companions, we also began taking care of smaller jobs that were equally as important, such as "sheet mulching." Sheet mulching is laying down long pieces of cardboard in areas of the farm and covering them in a layer of wood chips, and this serves several effective purposes on our farm. It smothers weeds by preventing them from growing upwards or reaching sunlight, making it easier to get rid of them later, or allowing us to leave them alone entirely. It also helps create more obvious pathways so no one walks in the beds. We mainly used sheet mulch on the pathways, but it can also be used in the actual beds themselves to trap moisture in the soil in order to save water. This is especially helpful as it allows us to be more efficient in our irrigation systems. The cardboard is stiff at first, but as it starts to get wet and softens up, it blends into the farm and is hardly noticeable. The process only takes a couple of minutes, and is very easy, considering the several helpful effects it has on the farm.

- Chloe Holder

Other sources used:
https://linkprotect.cudasvc.com/url?a=https%3a%2f%2fmodernfarmer.com%2f2016%2f05%2fsheet-mulching%2f&c=E,1,aSb7jQqpEZ7zZ2_H6tqefz7hmX_dTDVb0vNuSOIL3SAYhN9894yJCwurQzGfHeB04FCuWduxvu7tsH5_FY4JgXGFXao3YXTTM1FhwuW_P_EMhg,,&typo=1
https://linkprotect.cudasvc.com/url?a=http%3a%2f%2fwww.marinwater.org%2f158%2fSheet-Mulching-Guide&c=E,1,lSoUzOsxO1W0z_G56UVQD43FYFvQP7aCSipJRPg3xlBrPBjUehoOaetkl8OIwijSyAG-4YKYs6vQxBSu8jl6dwxIN79tuDFSYmYecT3f984,&typo=1


How to Take Care of Seedlings


When plants go from an environment that has controlled temperature, light, and heat to being planted in a bed outside it can be very hard for them. There are two very important things to know: when to move the plant and how to take care of it once it's moved. A good general rule is when the seedling has 3-4 real leaves it's big enough to move. Because the plant will need more energy to survive outside then it did when it was inside and it needs the energy and nutrients stored in the leaves to help it survive. The first month can be very crucial for the seedlings and it's very important that the new plants are watered every day. When the sprouts are growing they use and lot of energy and they need more nutrients. The water is also used for the process of photosynthesis, which is how the plant gets its nutrients needed to grow. It's also very important not to over water the plants because that can lead to rotting. In the picture you can see the plant in the middle is healthy but the plant on the right was overwatered and as a result died and the one on the left was underwatered and it died as well. Its important to not drown the plant in water but not let it dry out. 


The use of Fertilizer


This past weeks in sustainable agriculture we got our beds ready for planting. The first step in was to double dig, which aerates the soil and helps grow better crops. The process of double digging was very easy we removed a section of dirt of the end of the bed and moved it to the other end. We then aerate the space where we took out the dirt using a spading fork which created  more air pockets which allowed the water to be absorbed by the soil and the roots can now grow easier. After this was done we used fertilizer to make sure the soil is fertility and can grow nutritious crops and more healthier crops, the fertilizer also contains plant nutrients such as phosphorus, nitrogen and potassium.
-Camilo


Time to Mulch!


As we start the week of with some mulching, it's important to understand this concept: the reason of mulching and why it's important for our small trees in our growing garden. Some background information on mulch: Mulch is basically compost mixed in with bark and/or wood. Mulching is used to improve a trees health. It is a layer spread around our trees at a certain diameter in order to help stop weeds from growing. In a way, mulch is a protector for the soil. Mulch is needed in order to prevent any root competition, it holds moisture in and prevents soil compaction as well. As it breaks down, the nutrients from the mulch transfers to the soil and adds nutrients which is a big help to the trees. It is very important not to let the mulch come in contact with the trunk or else it will kill the tree instead of allowing it to grow. When the mulch touches the trunk, the roots growing upwards will cause stem girdling roots and eventually kill the tree, which is something we don't want for our tree! You should never let a layer become deeper than 3, or even worse, 4 inches inches. Spread the mulch wide enough to cover the root system and remember to mulch on newly planted trees. We started to sheep mulch near our beds, but take a turn in mulching a tree sometime! The trees will thank you for giving them a boost of life!

Geraldin Hernandez


Tuesday, September 18, 2018

One Bed Crop Plan and Calculations

As we get closer and closer to finishing our preparation for our one bed projects, one of our final prep jobs is to decide what crops we want to grow over the course of the fall season. This week students were given the opportunity to choose any five crops they wanted to grow this fall season. Choices ranged from a head of lettuce, to bunches of bell beans. With these choices, came requirements and expectations. On top of choosing what crops we wanted to grow this season, we were also asked to complete a empty table full of listed calculations and data values. The data table included things from the total square feet you needed from your bed to actually grow the crops, to how many pounds of the crops your expected to grow during the season. Although the calculations took a bit to complete and fully understand, the actual numbers we get from these calculations are important because they help guide us what we're going to grow this season as well as what we need to do in order to meet these data expectations. These calculations aren't only just used exclusively for the fall season, they're also used for all the other seasons we grow in class, including both winter and spring. We not only use these numbers to help gauge how much were going to grow of each crop, but are also used to check back upon the end of each season in order to see whether or not our designated group for the one bed project actually met the required amount of pounds of both calorie and compost, calorie being 30 lbs and compost being 18-20 lbs. Without these calculations, we wouldn't be able to determine whether or not our group actually would meet the given requirements of the actual one bed project as well as how much of each crop we needed to grow in order to meet those given requirements.   

- Matthew Pollock

*below is a picture of a student working on the one bed calculations for plant bed A1 for the fall planting season